Divi is a theme where you can design the header exactly to your liking. Thanks to it you will have on the web a header that contains more than just the logo and menubut also links to social networks, phone number, buttons, just everything you want to have there.
First, create a menu in WordPresse, as it forms the basis of the header. Then give it the right touch in Divi. 🙂
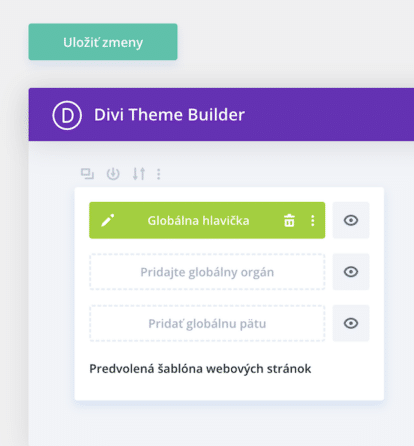
In this article you will find detailed instructions on how to create a global header on your site when using the Divi theme.
1. First, create a menu in WordPress
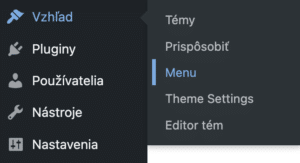
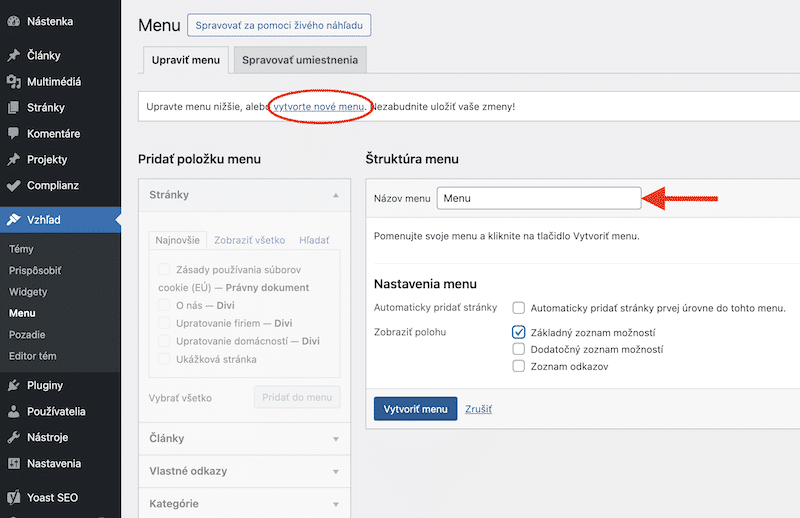
Log in to your site administration. In the menu on the left you will find the menu item
“Appearance”
a
“Menu”
.
Then click on
“create new menu”
and write its name in the appropriate line, e.g. Menu or Main menu.
Below in the section
“Menu Settings”
check where you want the newly created menu to appear on the site (what type of menu you are creating):
- Primary menu (Primary menu in the site header),
- Secondary menu,
- List of links (Footer menu – Menu in the footer of the site).
Since we design the menu exactly according to ourselves later on, just tick
“Basic
list of options”
.
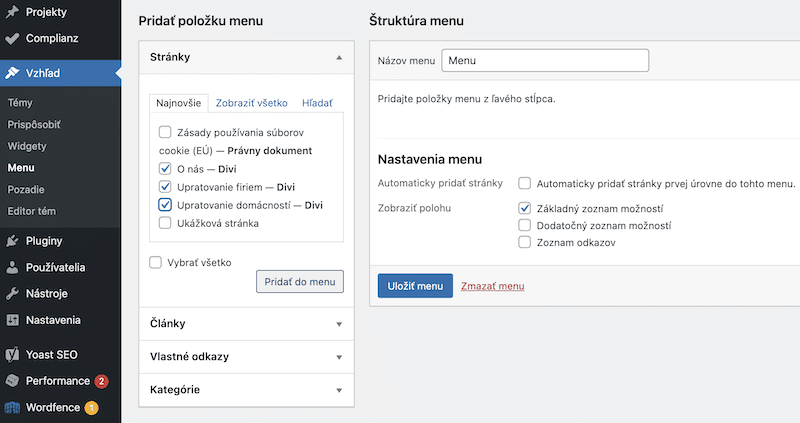
Click on the button
“Create menu”
all the items you can add to the menu become active. At your disposal:
- Site,
- Articles,
- Custom Links,
- Categories.
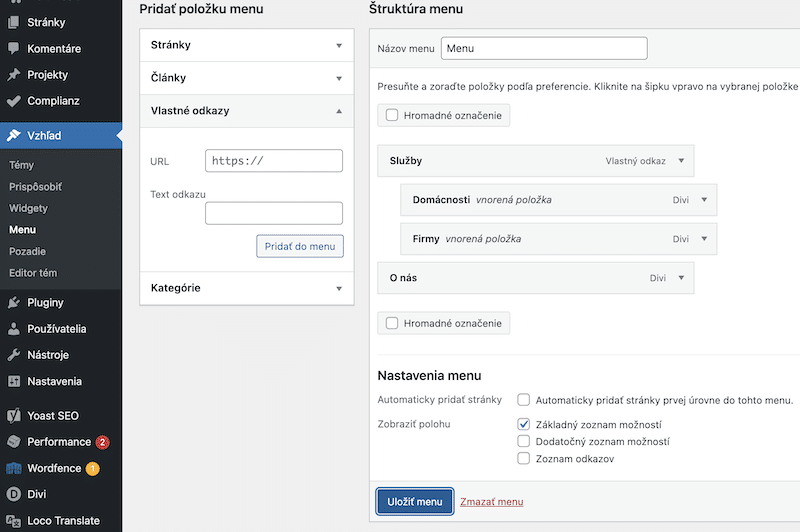
a) Add individual pages to the menu
Most often, pages are added to the menu. Tick which specific pages you want to insert and then click
“Add to menu”
.
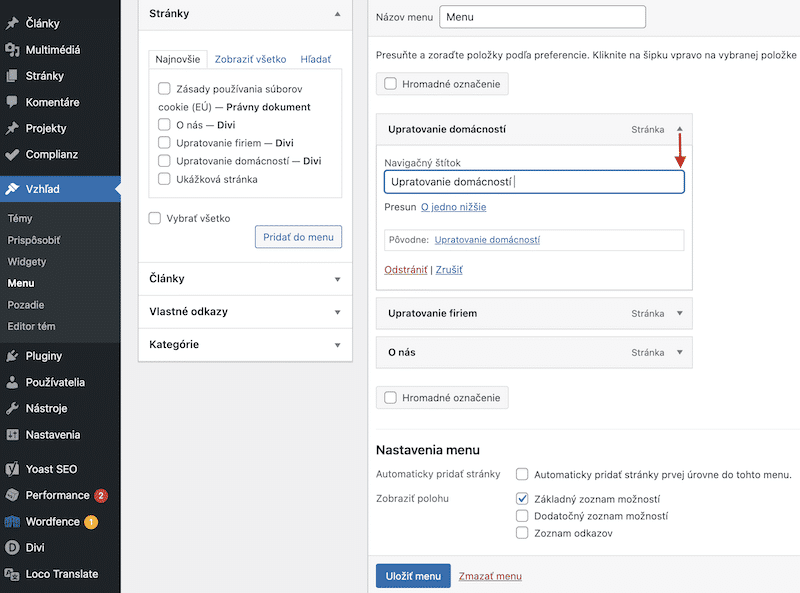
You can change the order of the selected pages in the menu at will. The Drag and Drop technique works. If you click on the arrow next to an item name, you can also change its name. 🙂
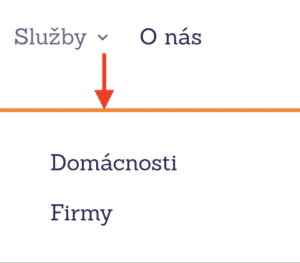
b) How to create a drop-down list in the menu?
If you have pages on the site (e.g. Household Cleaning, Business Cleaning), you want to place them under a common name in the menu (e.g. Services), use the
“Custom Links”
.
In this case, we will not add any real link because we don’t want to redirect the client anywhere. We want him to expanded the list with more options. Then, in the line that is intended for the link (url), type the grid character
“#”
and in the text the name to be displayed in the menu.
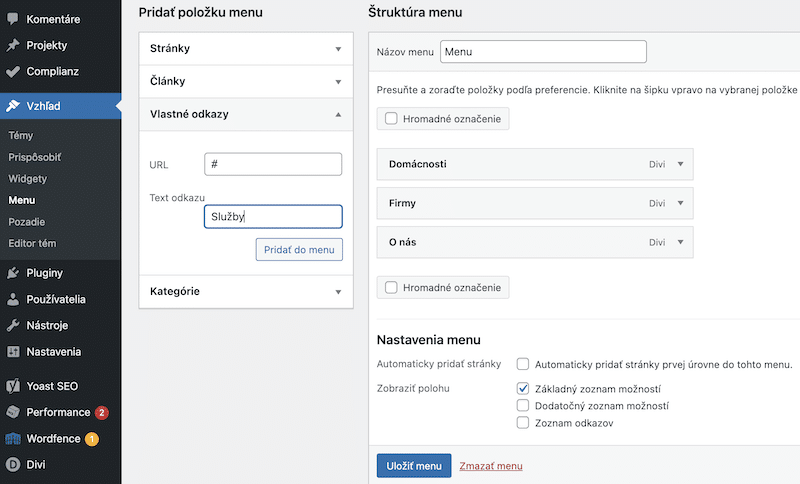
Again, we will use the Drag and Drop technique and refine the display of individual items in the menu. When you drag an item slightly to the right, it becomes a nested item that will form a drop-down list.
2. In Divi, design a header exactly to your liking
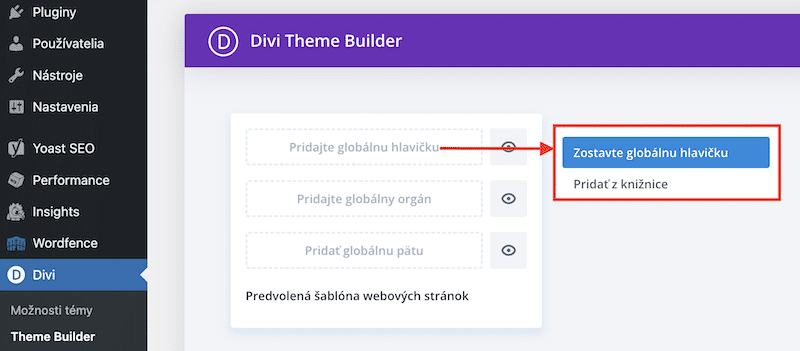
Since you have the Divi theme installed and activated, in the site administration, in the left menu, you will find
“Divi”
. Expand it and select the option “Theme builder”. This will take you to the area where you can add a global header.
You won’t find a standalone header in the Divi library, only as part of an already designed page. If you find a page where you really like the header, use it and delete the extra sections (you’re left with just the header).
I chose the option
“Build global header”
and I’ll show you how to create a header from scratch. 🙂
Divi Theme Builder uses 3 building blocks:
- Section (blue rectangle),
- Line (green rectangle),
- Module.

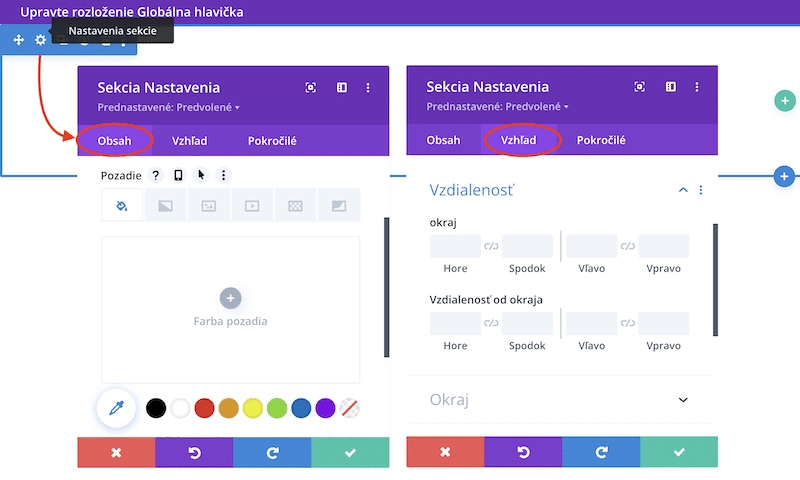
a) First insert and edit the Section
A section is like a blank sheet of paper on which you start writing either portrait or landscape, completely from the edge, or place text or other components straight down the middle. You can even choose its colour.
To add a section, click on
blue “+”
, for the need of a global header is quite sufficient
“Normal section”
.
Via the gear wheel you can access the section settings. There are tabs for Content, Appearance and Advanced. Feel free to take a look at what each tab contains. In the Table of Contents you select a colour for the header background, in Appearance set the distance from the edge.
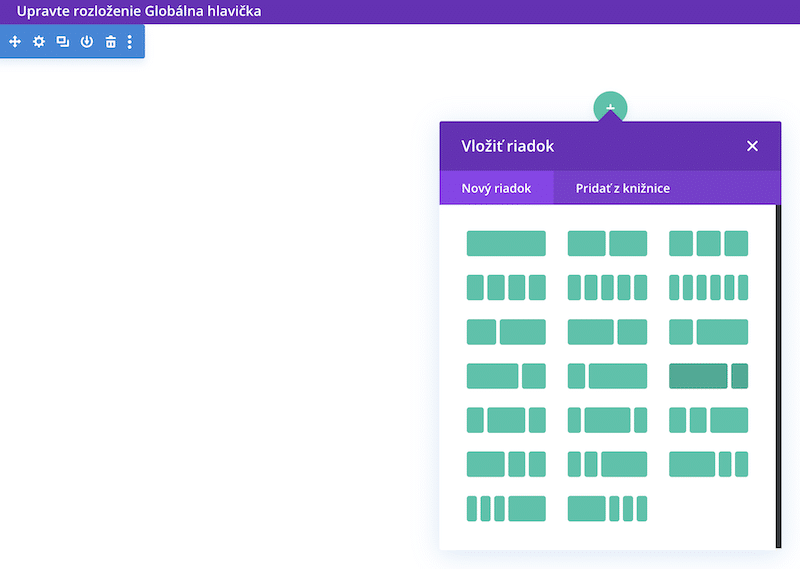
b) Then select the appropriate Row layout
Let’s continue with the clean paper example. Below the line, imagine how many parts you fold the paper into. Whether you fold the paper exactly in half or fold only a third of it, or whether you end up with a finished origami. 🙂
The row specifies the number of columns and their layout. In Divi Theme Builder you insert it via
green “+”
.
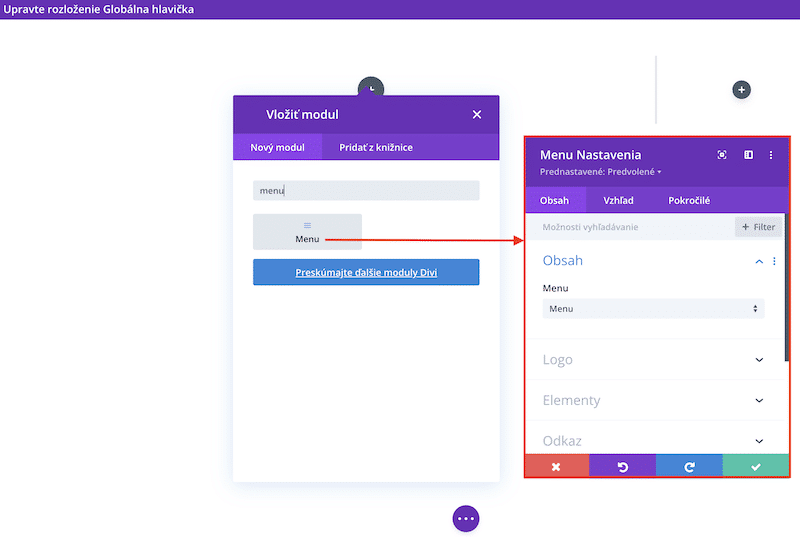
c) Finally, add specific content – Modules
We have the clean paper folded the way we need it. Just add cut-out photos, write notes, highlight important thoughts, stick in the cinema tickets and the experience diary page is ready.
The module presents content as text, image, button, icons – linking to social networks…, which you add by clicking on
dark grey “+”
.
In our global header there will be a menu on the left. To avoid having to scroll through all the modules Divi Theme Builder has to offer, type “menu” into the search box. Our newly created menu is automatically dragged into the selection. If we had multiple menus created in WordPress, we would have to select the one we want to place in the header.
We have mastered the technical part, we are going to design. Also for modules you have three tabs: Content, Appearance and Advanced. Contents – in the Logo section upload a photo of your logo, Appearance – in the Text section of the menu set the font size, in the Size settings section adjust the width of the logoto make the logo and menu fit on one line.
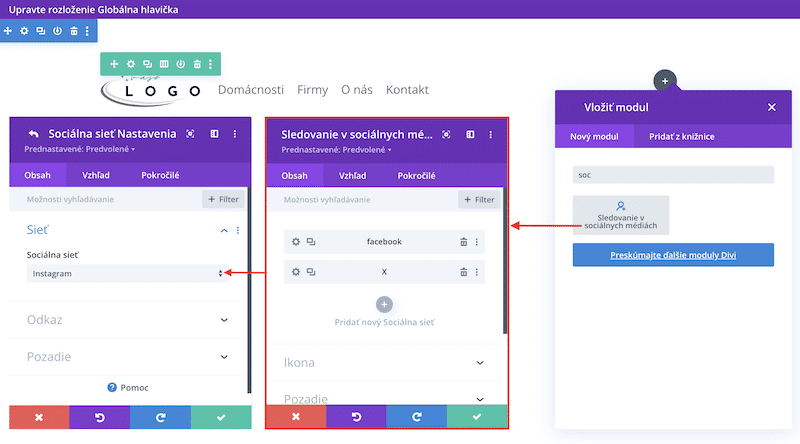
In the second column place e.g. links to social networks. In the right column, click on dark grey “+” and type “soc” in the search box. You will see the module “Social media tracking”. Modify module – select a specific social network (Facebook, Instagram, LinkedIn…) and under Link add the actual link to your profile. In the Appearance tab, design how the social icons will look.
Only redirect a website visitor to social media if they find quality content that confirms your professionalism. Most of the time the process is the other way around, that you bring people from social networks to your website where the sale/purchase takes place.
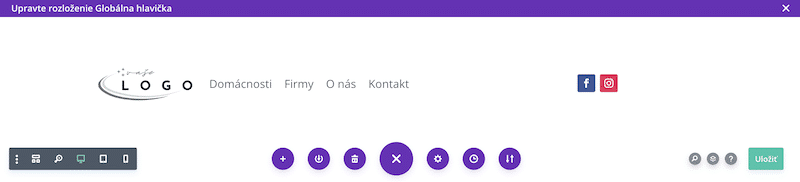
Save the created global header first in the Divi Theme Builder environment – click the purple circle at the bottom of the page. You will see a “Save” button on the right, and a menu on the left with options to view the header for desktop, tablet and mobile (tweak any gaps for each device).
Then save the global header in the WordPress environment.
3. TIP ABOVE
How to move a visitor from a menu to a specific place on the site?
“Custom Links”
will also serve you well if you want to move the visitor directly from the menu to a specific section on the page. For example, when a client clicks on “Contact” in the menu, they will be taken to a footer where they will find all your contact information (you will use this especially when you don’t want to create a “Contact” page)
For this to work, you must first mark the part where you want the client to move to. This is done by CSS ID – a unique identifierthat you can add to any module, row or section on the site. I added it in the footer in the Text – Contact module.
The CSS ID can be found in the settings of each module (in our case text), in the Advanced tab. On the appropriate line, type a unique name that you will use only for this purpose. The name must be without a space (e.g. contact, contact-event). Save the modifications to the module.
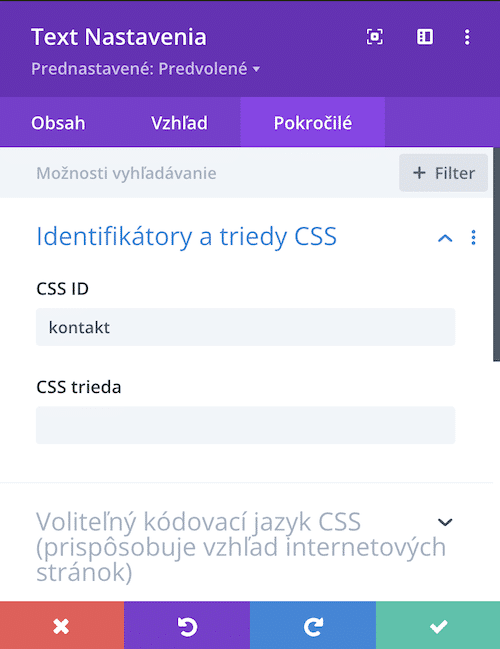
Then go back to WordPress – Appearance, Menus and select the menu you are using in the global header. Add to the menu “Your own legacy” and in the line that is designated for the link (url), type the grid character along with a unique identifier, in our case
“
#contact”
. Complete the title and add your own link to the menu.

Done! When a visitor clicks on “Contact” in your global header, they will be taken to the footer where they will find all the necessary contact information.
I create websites and graphics for women that match them. Thanks to this, they can authentically spread the message of their business and thus more easily get the right clients. I like it when the web breathes with the charisma and style of a woman. It has a clean and distinctive design that underlines her personal brand.